The words EFI Conversion to classic, carbureted muscle car owners might as well be spoken in a foreign language - most dont understand how you do it or think its too much work. On the other hand, they might suffer from carburetor problems, including bad gas mileage, and do nothing about it. What if there was an easy solution that allowed you to convert your classic muscle car over to fuel injection in a weekend and never have to worry about tuning it...ever? Well there is an answer, and its called the FAST EZ EFI. We installed one on a 68 Camaro to answer the question - is this idea of self-tuning really possible?
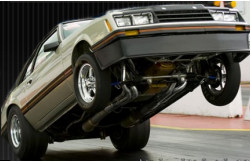
 Mark Englands 68 Camaro
Marks Camaro was a perfect candidate for an EZ EFI install - under the hood was a relatively stock 350ci small block Chevy with basic bolt ons like an Edelbrock intake and carburetor, as well as an MSD ignition system. Other than that, the configuration was very basic - all the way down to the mechanical fuel pump.
Marks Camaro runs fairly well due to the considerable amount of time put into tuning the current carburetor. Idle air fuel ratios are good, but the throttle response is not very crisp. Under cruising the Camaro runs a bit on the rich side and wants to stumble slightly when you mash the throttle. Under full throttle the Camaro performs well, but could definitely benefit from better partial throttle tuning.
 FAST EZ EFI Fuel Injection
The EZ EFI fuel injection system from FAST is designed for just about any engine that can accept a 4150-style carburetor. Everything from your fathers 289ci 66 Mustang to a off shore boat with a 500ci big block Chevy, the EZ EFI can handle it. We felt that there were a couple of barriers for people to venture into the EFI world and wanted to, said FAST engineer David Page. They just didnt want to go through the work and the cost of changing out the intake manifold. Another barrier was that they were afraid or they didnt have access to the training on how to tune. Now we can help them overcome both those fears. One aspect to remember is that the EZ EFI is a fuel only controller and does not support spark control.

The EZ EFI comes as two main kits; their base and master versions. The base kit starts with the heart of the system being the EZ EFI throttle body. The throttle body comes completely assembled from FAST and is very similar to the dimensions of any 4150-style carburetor.
Developing the throttle body was probably half the development time that went into designing the EZ EFI unit, Page explained. We worked with the placement and angle of the injectors in a variety of different situations and there is some very specific machining done to the throttle body to ensure a proper air/fuel mixture from cylinder to cylinder. That means that everything from the mounting flange, air filter, and throttle linkage will bolt up just like it did to your carburetor. Also hood clearance will be virtually identical between the throttle body and your carburetor.
The throttle body comes with four integrated 88lb per hour injectors, fuel rails, cross over line, MAP, throttle position, idle and air temperature sensors. The only sensors that are not contained within the throttle body are the coolant temperature and wide band O2 sensors. FAST even includes a O2 sensor bung plug if you do not have welding experience and need to install it at your local muffler shop prior to installing the complete kit.

From an electronics perspective the EZ EFI is a very self contained unit. All the wires are wrapped in convoluted tubing and comes labeled. The only exposed wires are two power (constant and switched), battery ground, and tach. Additionally there are ground switch wires for A/C idle up, fuel pump, and fan switch. The ECU is a compact and sealed unit to keep it from getting damaged from weathering, though FAST does recommend that you mount the ECU in the cabin and two feet away from your ignitions CD box or distributor. Another nice add-on that comes with the kit is a tach signal converter for those of you not running an CD box and prefer a HEI or similar type ignition.
PN 30226-KIT Basic Kit Comes with:
Throttle body assembly and new gasket
EZ EFI control unit
Hand held display
Wiring harness
Coolant temperature sensor for 3/8 NPT and 1/2 adaptor
Wide band O2 sensor and bung
Upgrading to the Master Kit
With any carburetor to EFI conversion there is the need for a high pressure fuel pump. Also, most people run a dead-head fuel system with no return line with their carburetors. The EZ EFI needs a feed and return line and the Master Kit gives you just about everything you need to do complete the entire installation. The real bonus is the plug-and-play fuel pump harness that plugs into a specially designed plug on the EZ EFI harness and allows the ECU to completely control priming and power to the pump. There is a single power wire that runs to the fuel pump and then the ground side of the pump will attach to the chassis, at the pump.
 The Master Kit comes with just about everything you need for your fuel system
PN 30227-KIT master kit includes everything from the basic kit plus:
700hp capable fuel pump
Assorted black AN fittings
Billet fuel filter
Plug and Play relay harness
Fuel pressure regulator and gauge
25 feet of -6 AN black nylon push lock line
The Install: Removing the Carbureted Components and Fuel System
 Since the Camaro's (and virtually all carbureted vehicles) stock fuel tank does not come with a return line, one must be added. First, we started by draining and removing the fuel tank out of the Camaro by disconnecting the two side straps and fuel filter neck.

A return line can be as simple as adding a barb fitting into the side of the tank. Going for a more sleek look, we decided to add the return line into the factory fuel sending unit and run it parallel to the feed. We then reinstalled the fuel tank and filler neck.
 Removing the stock carbureted components is a simple task. We started by removing the air cleaner, throttle cable, and transmission kick down. Next it was onto the fuel line and we removed the fuel pressure regulator as well. The last piece was the mechanical fuel pump that we blocked off with a plate from Canton.
Installing the EZ EFI Throttle Body and Wiring the Electronics
Removing the stock carbureted components is a simple task. We started by removing the air cleaner, throttle cable, and transmission kick down. Next it was onto the fuel line and we removed the fuel pressure regulator as well. The last piece was the mechanical fuel pump that we blocked off with a plate from Canton.
Installing the EZ EFI Throttle Body and Wiring the Electronics
 On the back side of the Edelbrock intake manifold is a vacuum block that must be plugged so the vacuum lines from the EZ EFI throttle body can clear the manifold. Those lines will be routed back to the vacuum ports on the throttle body.
 Next, mount the EZ EFI throttle body to your 4150-style intake manifold. As we said before, the throttle body has virtually all the same dimensions, allowing the throttle cable, transmission kick down and air cleaner to mount up just like it did on the carburetor.
 The ECU is mounted right behind the glove box and the harness is tapped through a hole to the left of it. FAST recommends mounting the ECU inside the car to keep it away from the weather, and since Camaros never came with factory EFI wiring harnesses, we needed to make a hole in the firewall for our girthy harness. We wanted to make a hole that was only as big as we needed it to be so we could feed each harness plug independently through the firewall hole. With the harness through and taped back up, we then added a firewall grommet to keep the harness from getting cut.
 There are two sensors that need to be installed outside the EZ EFI throttle body. First was the coolant temperature sensor that we opted to install into the top of the water pump. Other locations like the heads water jacket or coolant ports next to the intake water neck are all suitable places. Even if all these spots are filled with other sensors on your application, there is always the option for an inline adaptor on the coolant hose.
 The next sensor is the wide band O2. FAST recommends installing this at least 12 away from your exhaust port and into a collector. The wide band is the primary difference between an OEM computer and the EZ EFI, Page said. Also the OEMs spend thousands of hours calibrating each system. They can run a narrow band sensor because they only need to correct within a narrow range, due to all that calibration R&D. It is very specific on how that application will be used, whereas one engine could be 302 cubic inches in a street car or 500 cubic engines on an air boat when using an EZ EFI system. The wide band allows for a much wider tuning window.
 We decided on the passenger side collector and checked for clearance before removing it. We needed to install the sensor at a slight angle, between the 10 to 2 oclock range. Do not install the sensor towards the bottom of the pipe as it can be damaged from condensation, or simply break off if you were to run over something while driving. Sean then removed the header and welded in the bung where he previously marked it.
 The remaining wiring is very straight forward. There are large-gauge red and black wires that MUST be routed directly to the battery. The EZ EFI electronics are sensitive and cannot be tied into power and ground circuits that might be dirty from other electronics. The 12-volt switched wire will go to a key-on source that does not interrupt during cranking. The most important part of the wiring outside the power and ground is the RPM wire. The EZ EFI does have a safe mode if there are check engine light problems, but not for the RPM - without this source it will not run at all. The key to the RPM wire is a clean signal.
 The Camaro already had a MSD 6AL so we were able to tap directly into its RPM signal wire. If you have a vehicle that is an HEI unit or read-to-run type, FAST includes a signal converter that you can hook to the negative side of the coil to help filter out the signal. The remaining wires are ground circuit switches: fuel pump, A/C idle up, and temperature controlled fan switch.
 The hand-held display comes with a cigarette lighter adaptor for ease of use and does not need to be present in the vehicle for the EZ EFI to run. If you prefer a more permanent install or dont have a cigarette lighter, you can chop the plug off the end and wire it to a power and ground switched source.
 Finishing up with the Fuel System
 Since we opted for the Master Kit, we had virtually everything we needed from a fueling perspective. There isnt any relays to wire as the kit includes a plug-and-play relay and a single power wire that will run to the fuel pump. The fuel pump comes with a wiring harness that will connect directly to the 12 volt wire from the relay and then the ground side can be affixed to a neighboring chassis bolt. The fuel pump comes with an integrated pre-filter and FAST includes a billet post filter and adjoining -6 AN collar.

We installed the regulator in the same location as the original carbureted regulator with the included fuel pressure gauge. The fuel lines consist of push lock AN fittings that are easy to assemble.

One trick is to cut the hose to the required length, place one end at a time in warm water for a few minutes, dip the barb side of the AN fitting into the water, lock the fitting into a vice and then press in the fuel line up to the collar. The hot water will expand the hose while providing lubrication to secure the fitting. The feed and return lines will secure to the tank via a hose clamp. If you have a fuel cell with AN fittings, you may need to purchase a few extra fittings for your application.
Final Checking and Programming the ECU
Before worrying about the programming perspective of the EZ EFI hand held, cycle the fuel pump a couple times to check for leaks. Once everything has been certified dry, set your fuel pressure while priming. You should be at 43psi if you are under 550 horsepower at the crank and will creep towards 60psi if you are over that range.
 Next, with the electronics on, follow the simple setup screen that asks you questions like the size of your engine, idle speed, fuel pressure, and number of cylinders. It will then prompt you to calibrate the TPS in idle and wide open throttle, which we obviously did with the vehicle off.

We then cranked the vehicle over and it fired almost instantly. The display will give you a target window to adjust your idle speed to by using the idle set screw on the throttle body, which is in the same place as a Holley unit. Once the idle is calibrated, further adjustment can be done directly through the hand held display. Also check to make sure your fuel pressure is still spot on (with the vacuum line disconnected) and lock down the set screw.
Final Impressions on Driving

After seeing how easily the Camaro started on the first try with the EZ EFI installed, we had high expectations for how it performed on the street. Needless to say we were equally impressed by how well the Camaro drove under an array of driving conditions. It starts out with basic closed loop operation, which is nothing new it has been the basis of EFI operation for a long time, Page explained. It uses a wide band O2 sensor and it compares the target air/fuel ratio that is set inside the ECU to the actual air fuel ratio the vehicle is producing. It then adds or subtracts a correction amount to make those two numbers match. What is unique about the EZ EFI is that it takes that percentage and makes a fuel map based on the correction. Essentially it builds a new map for that engine and application so that it operates at zero, or near to zero correction factor.

Coming up to a stop light the car decelerated crisply and then accelerated out of the light without hesitation. Wide open throttle only took three to four blasts for the air fuel ratios to be on target while idle and part throttle followed suit. There was no doubting that we were going to pick up three to four miles per gallon easily, under cruising conditions.
When we asked Page about proper break in techniques for a new EZ EFI tune, he remarked, The more random the better - its all about just hitting the streets. The beauty of it is that you can actually feel and hear the engine smooth out as it learns the specific areas. If you have a vehicle that has low idle vacuum, let it learn the idle first in your driveway. The wide open throttle portion is the easiest part of the learning for the ECU. Two or three wide open throttle blasts, it will learn the wide open portion. Put the vehicle in the RPM ranges and situations in which you are mainly at the most.

In the course of a eight hour day we were able to install our FAST EZ EFI and fuel pump kit. Setting up the EZ EFI couldnt be easier. The small block came to life the first time we tried to start it and performed flawlessly. Now when it comes to converting your muscle car to fuel injection, you can have a little piece of mind knowing that FAST has designed a system that almost anyone can install.
SOURCE:
FAST
Web:
www.fuelairspark.com
Phone: (877) 334-8355
More...


 Linear Mode

